For being an “easy” lab, this was surprisingly hard. I spent way too much time going down another rabbit hole and I’m still not convinced my way wouldn’t have eventually fielded results. Unfortunately, I was asking more and more from my laptop and ultimately needed to browse around for a better solution.
The solution I stumbled upon eventually worked, and I even got the opportunity to try some new tools out.
So let’s begin.
As always, I’ve attached a link to my original notes on this lab so you can see where I bashed my head into the wall for a couple of hours.
To begin we need to download the zip file provided and are also provided with a SHA256 Hash that is supposed to be the password we are looking for:
0c48ca8a4a3ab2f73f76b0e6535c2feb510c1caf16b8bcc41c74b392c945e4dbAfter downloading the file and unzipping it, I am given an .exe named EasyPass.

When the application is opened we are displayed with a prompt asking for a password.

To start, I tried just entering “password” to see what would happen.

I figured it wouldn’t hurt to try guessing a few more and attempted to do that. I had no luck but did learn that it didn’t block multiple failed attempts to log in.
I knew guessing wasn’t going to get me anywhere so my next strategy was to either crack the hash or try to brute force a login to the application. I actually spent some time considering the brute-force attempt to log in to the application. I was about to write up a quick Python script that would just use on-screen clicking and typing to do it but figured this would be crude and the lab most likely wants me to pursue cracking the given hash using other means.
So I abandoned that brute force attempt and began to explore cracking the hash. I knew the lab was “easy” so I assumed I would most likely have to perform some type of elaborate script with Hashcat to break it.
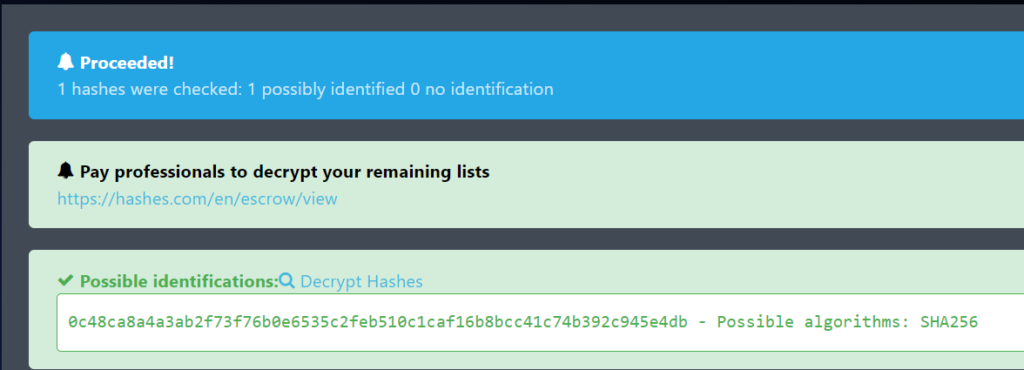
Before getting into Hashcat though, I decided to run the hash through an online resource to see what I could get.

It was able to identify the hash and confirm a SHA256 algorithm was utilized. Unfortunately, though, it was not able to determine what the password is.
This is the part where I spent way too long trying to brute-force this hash. I popped open Hashcat and started filtering through the possibilities. I first tried the rockyou wordlist.
hashcat -m 1400 [HASH] [PATH TO WORDLIST]That didn’t work, so next I tried brute forcing the crack. I went through several iterations of this until the amount of time required to crack the hash just got stupid. I even opened up Hashcat on my main machine so that I could use the full power of my GPU but in the end, it was going to take something like 10 days to run through all the combinations. See below for what I eventually got to when working with Hashcat.
hashcat -m 1400 -a 3 -d 2 [HASH] ?a?a?a?a?a?a?a?aI made the assumption that HTB wouldn’t set a lab to “easy” and assumed everyone had super cracking machines so I dropped this pursuit and decided that I actually had to do something with the .exe file provided to us.
Unfortunately, I had no idea where to go with this train of thought. This was a first for me and I didn’t really know how to actually crack open the application to see the inner workings.
In comes Google. I had to get some help on this one and pulled up another person’s walkthrough.
They used a tool called Ghidra which was kind of cool because it reminded me of a Youtube video I watched a while ago where they were talking about the tool. I had to watch a video on how to install it and get some basics but it is fairly straightforward to get started with.
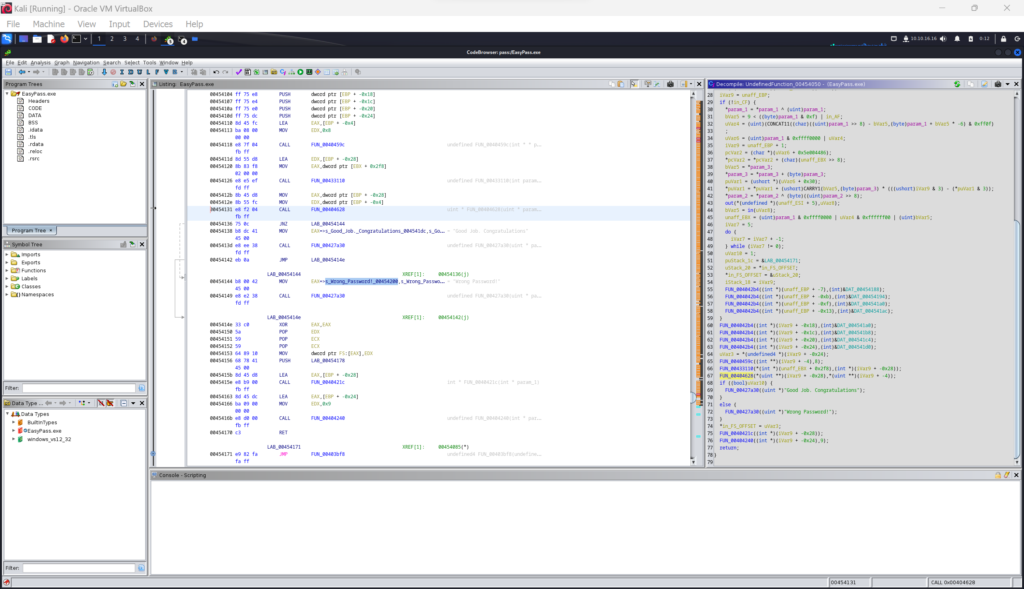
After opening the application inside Ghidra, I started browsing around and immediately got overwhelmed. I found the “Search” tab at the top and was able to search for strings. I started with the string “password” since I knew that was what I was looking for.

I found the memory point label of 00454131 which displayed some code snippets on the right side showing an if/else statement to compare param1 to param2. This very much looked like what I was looking for and could make the assumption that one of these parameters is the actual password or hashed password.
I got stuck again as I didn’t know where to find these parameters so I had to go back to the walkthrough I found online. This is where I got my next hint that I want to use some type of debugging tool.
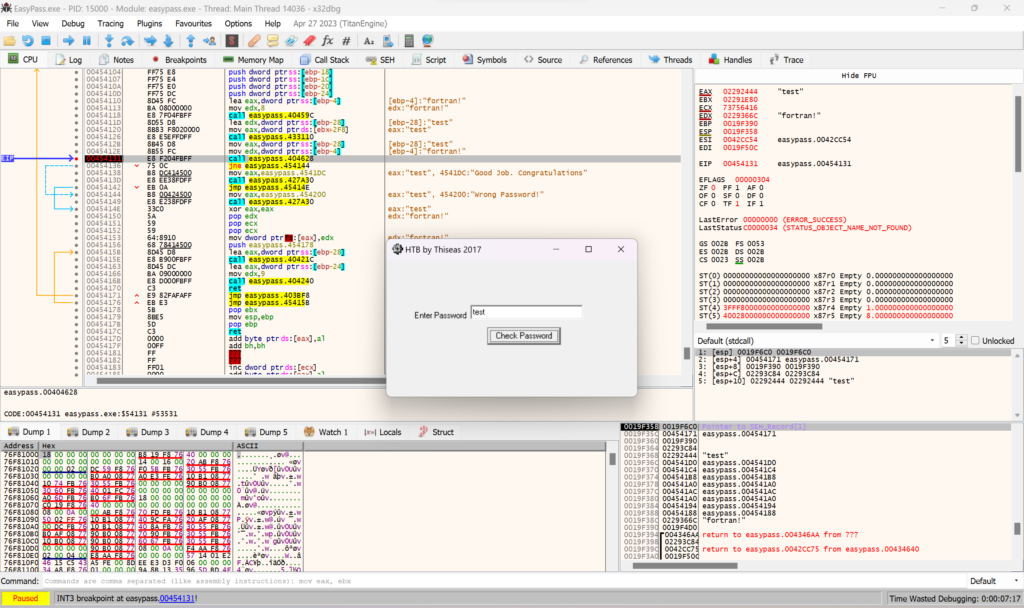
In my case, I decided to use a debugger called x64dbg. This can be installed and run on either Linux or Windows. I chose to actually run it on Windows.
Once I had it running, I loaded the application. I then scrolled down the left side of the screen till I found the memory point I located in Ghidra, 00454131.

From here, I right-clicked on the memory point and specified it as a breakpoint. This essentially means I can now run the program and it will stop at that point.
I next ran the application and tried plugging in a test password. If you see the image above, you’ll notice that my test shows up multiple times as well as another text string of fortran!.
Plugging this into the application gives me a successful login.
Overall, I can see this being an easy lab once you know the steps but having never actually analyzed code using tools like this, this was not easy for me. I’m also, still curious as to why they provided us with the hash at the beginning.
I assumed that we could try to crack the hash if we wanted but running this through my system would take days and that just doesn’t seem right for this type of lab.
My only other guess was that the password wasn’t actually stored in the application and only the hash. Which honestly is a better security practice but I couldn’t find it anywhere in the Ghidra analysis.
So… I’ll leave it here. I’m happy to have learned two new tools and can definitely see some applications for them. However, I’m still going to be annoyed I couldn’t figure out the reason for the hash.
For now, I’ll drop it.
As always, thanks for reading and I’ll catch you all later.
-sgtdiddlywink


