
After a couple of hours the night before, I finally got my Pwnagotchi up and running.
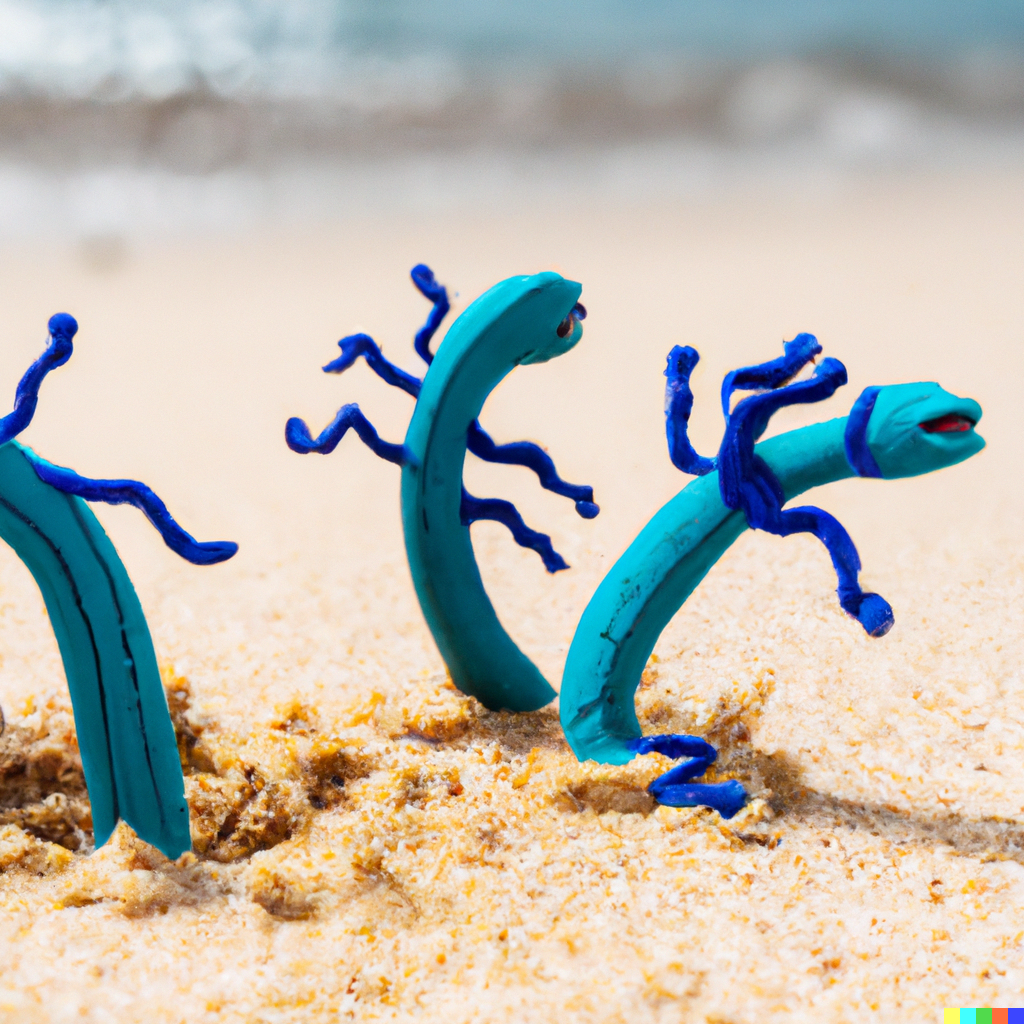
World, meet Kevin. Kevin, meet the world. Or at least a very small chunk of the world.
My wife and I were discussing names earlier that day and we were trying to figure out the male equivalent of “Karen”. A little fun fact: sounds like the internet can’t decide what it is either but Kevin popped up quite a few times so I thought it would be an appropriate name for such a device.
Besides all that, I got the thing up and running. Unfortunately, I still don’t have the screen for it but I do have the web GUI which took me way too long to figure out. Windows 11 users, this is a warning if you attempt this project. RNDIS Drivers are most likely not installed on your computer and Windows will most likely not recognize your device when you plug it in. I wasted so much time trying to troubleshoot this.
So, I’ll try to walk you through my setup and maybe it will help you all out. Overall it’s pretty easy depending on what you are doing or your setup. I’d highly recommend reading through the documentation on Pwnagotchi’s Official Website. They’ll walk you through 95% of it but they still missed a few things. Or I did. Most likely I did.
Materials
Once again, check out the website documentation if you want other options. I used the following (still waiting on the screen):
- Raspberry Pi Zero W v1 (V2 is really expensive)
- Header for Pi
- Sandisk 32GB microSD card (You should be able to use any quality card)
- Micro-USB Cable (That allows data transfer. Not all cables are equal)
- Waveshare elink 2.13″ Display
Adding the Header
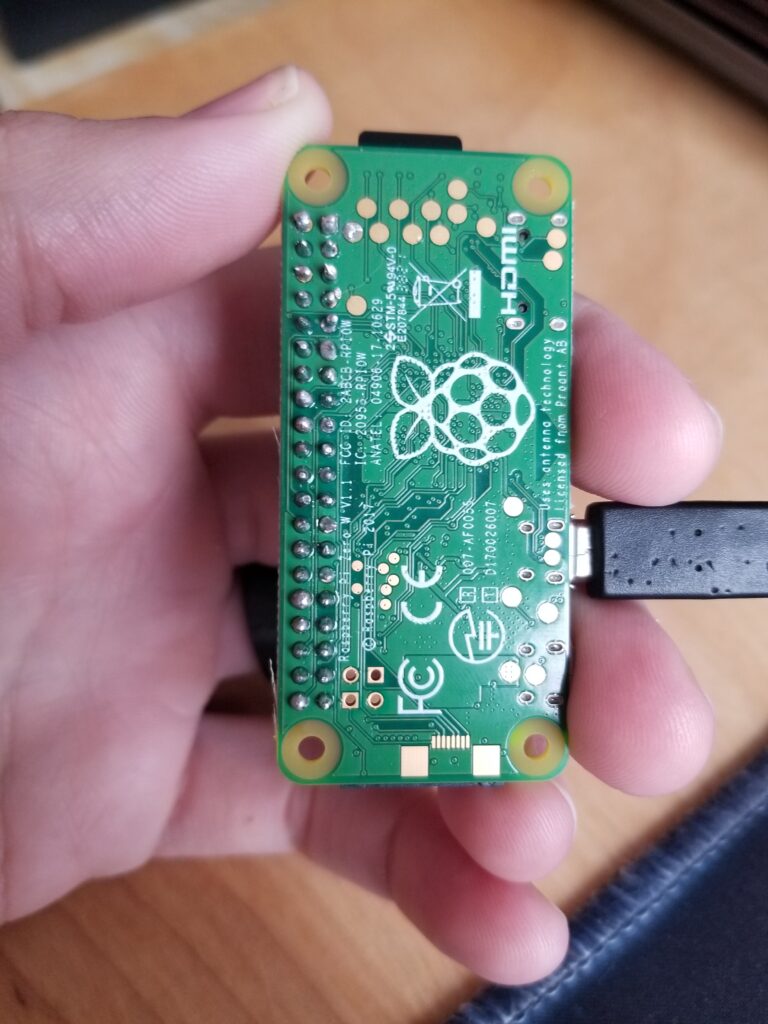
The first thing I did was solder the header to the Pi Zero. I made another post about this as it was the first time I had ever soldered before. It looks like crap but practice makes perfect. Once the screen comes in, then I can confirm if it works or not.
If you are not planning on using a screen, then this is not necessary. You can easily run your Pwnagotchi screenless and upload the data when you want. I’m a visual person, so I definitely want to add the screen.
Flashing and Installing
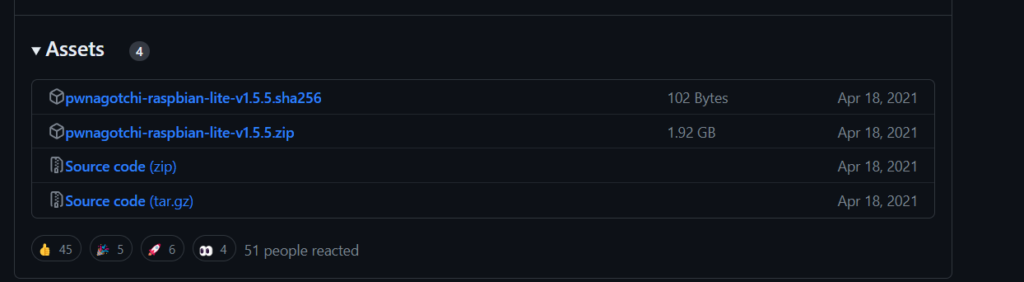
Start by visiting the Github page to grab the image for the Pwnagotchi. A bit down the page, you’ll find the “Assets” tab. Download the pwnagotchi-raspian-lite-v1.5.5.zip.
Once downloaded extract the files to same directory. In the extracted file there are two new files. The image file and encrypted file to verify the file.

I always use Raspberry Pi Imager when I’m installing image files. No particular reason other than it is pretty easy and user-friendly. The link above will take you to where you can download it. Just follow the instruction on the website.
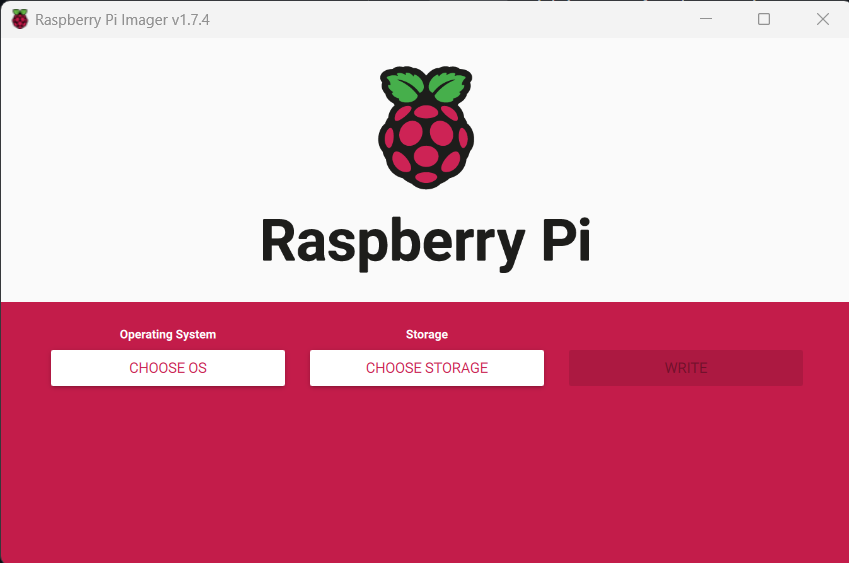
- Click the “CHOOSE OS” button.
- Scroll all the way to the bottom and you will see an option to “Use custom”.
- Click on that and select the Pwnagotchi image file in your extracted folder. Not the encrypted one (you want the .img file, not the .sha256).
- Make sure your MicroSD card is plugged into your computer. You can use an adapter like this one.
- Click the “CHOOSE STORAGE” button. If your card is properly plugged in, it should pop up as an option. Verify that this is the card you want to use because this next part is going to wipe everything from it.
- After you have selected the storage card, click on the “WRITE” button and select yes to format the card.
- This part will take a few minutes but once it is done it should let you know.
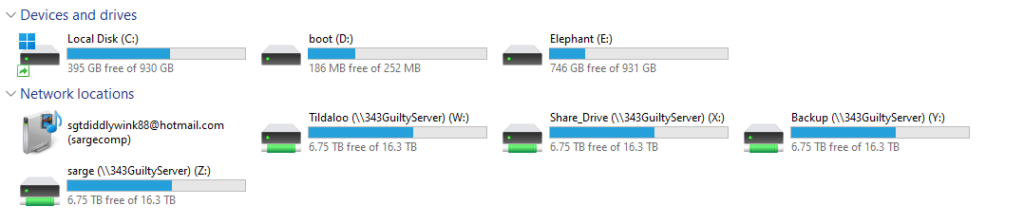
- After it is done installing, pull the MicroSD card from your computer and then plug it back into the computer. When Pi Imager is done installing the image file, it disconnects the card from the computer so you have to plug it back in to gain access to the files.
- Once the card is plugged back into your computer, File Explorer should automatically open to the card’s directory. If it does not, then just open File Explorer and navigate to the new boot drive on “My Computer”. See below, for an example. It is the “boot (D:)“.
- When you are in the card’s directory, “boot (D:)“, you will need to create a new file.
- Right-click and select New –> Text Document.
- Name the file
config.toml. Make sure to delete the “.txt” at the end. You will most likely get a prompt asking if you want to change the file type when doing this. Click Yes. - Next is to write click on the new file you just created and go to Open With –> Notepad.
- You will then copy the text below and paste it into the notepad that was just opened. After copying/pasting, save the file and close it.
main.name = "pwnagotchi"
main.lang = "en"
main.whitelist = [
  "EXAMPLE_NETWORK",
  "ANOTHER_EXAMPLE_NETWORK",
  "fo:od:ba:be:fo:od",
  "fo:od:ba"
]

main.plugins.grid.enabled = true
main.plugins.grid.report = true
main.plugins.grid.exclude = [
  "YourHomeNetworkHere"
]

ui.display.enabled = true
ui.display.type = "waveshare_2"
ui.display.color = "black"
Note: If you want to change your Pwnagotchi’s name, refer to the highlighted characters above. Just change this to whatever name you want it to be.
That’s really it. Or almost.
So once you are done editing the TOML file, eject it from your computer and plug it into your Pi Zero.
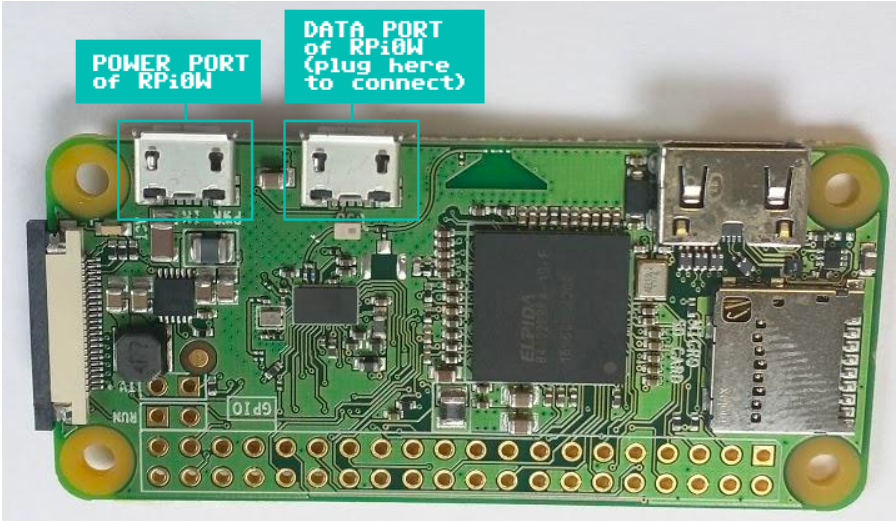
Next is to plug the micro USB cable into your Pi Zero’s data port. Most Pi Zero’s have the ports labeled nowadays, but it is possible yours is not. One should say “PWR” and the other should say “USB”. Or here is a great image from the official website.
Then plug the other end of the USB cable into your computer and wait. The Pi Zero is installing, booting, and creating keys. It shouldn’t take that long but if you interrupt it early, you may corrupt the keys and have to start over. Give it 5 minutes if you are worried.
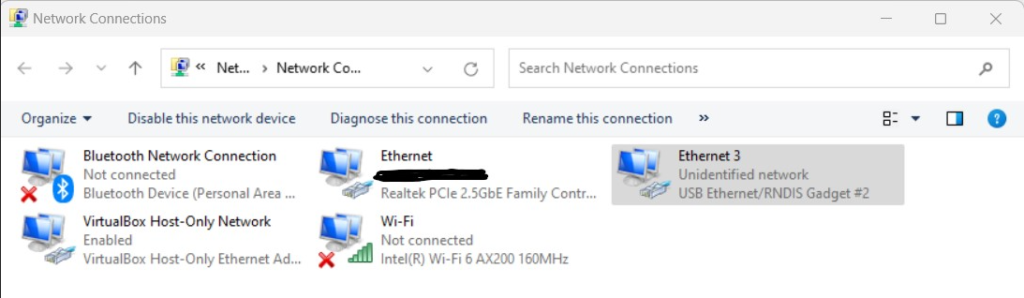
After this, you should be able to into your “Network Connection” page (Go to your search bar and type in Network Connections) and you should have a new network adapter labeled something like “USB Ethernet/RNDIS” in the menu. See below:
And this is where I got stuck. I’m on Windows 11 computer and for the life of me couldn’t figure out what I did wrong. I tried flashing the image multiple times, tried it on my Windows 11 Laptop. I tried different USB cables, and different microSD cards, and yet I was getting no response from the Pi Zero.
So I hit up Google. I found quite a few other threads with folks who have had the same issue but no one had an actual answer. I finally dug up a Reddit post that solved the problem. 10 points to Reddit.
Long story short but it looks like Microsoft doesn’t support the drivers anymore for this so you have to manually download and install them.
First, start by going to this link which should automatically download the drivers (I’ve had no issues with them but feel free to verify yourself before downloading).
Next is to go to your search bar at the bottom of your window and type in “Device Manager”.
Click the “Action” tab at the top of the window and select “Add Driver”.
Navigate to where you downloaded the driver from before and that should be it. It took about a minute for everything to start working but once it did, the new network adapter popped up almost immediately.
You can verify this by going back to your “Network Connections” window and you should see a new adapter similar to the one above. Next is to Righ-Click on the new adapter and select “Properties”.
In the scroll-down menu, you’ll find an option called “Internet Protocol Version 4 (TCP/IPv4)“.
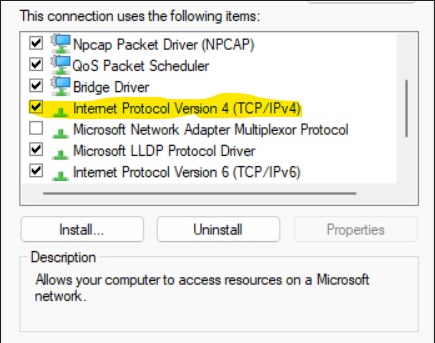
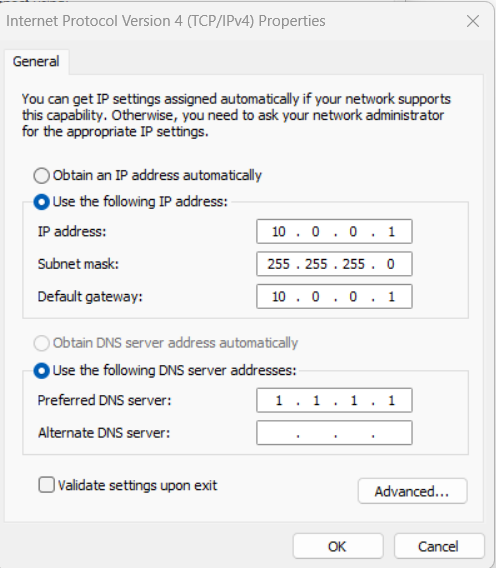
Select this connection and then click on the “Properties” button below it. Click the option “Use the following IP address” to set a static IP address. Insert the values from the picture below for the IP, Subnet, and Default Gateway. You can use the DNS server I have shown or select a different one. Select ok and we should almost be done.
Once this is all done, open up your favorite browser and navigate to the following URL:
10.0.0.2:8080You’ll be prompted for a username and password. By default these are:
- Username –> changeme
- Password –> changeme
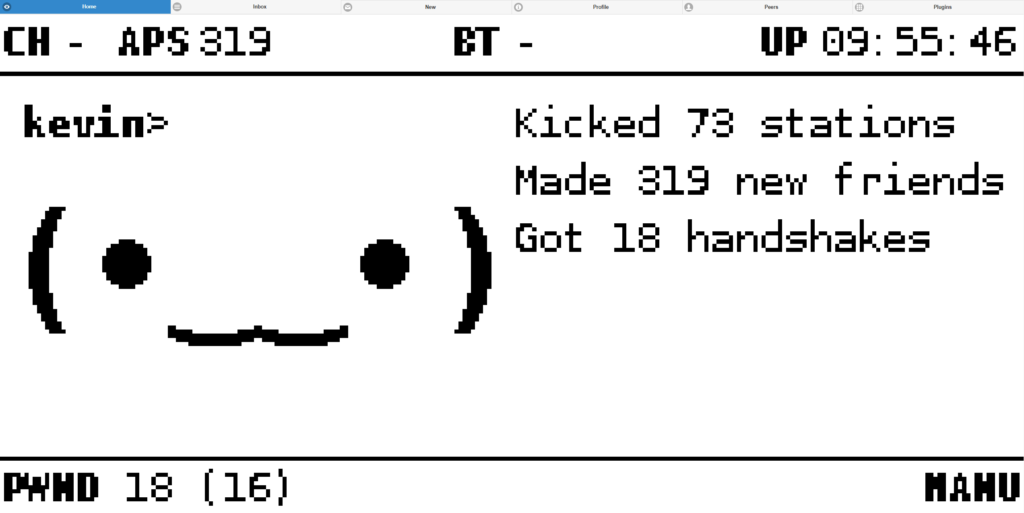
You should now be logged into the web GUI. Congratulations.
You can also SSH into it through PuTTY if you want. Just use the IP Address of 10.0.0.2 and the default username and password:
- Username –> pi
- Password –> raspberry
I went through and changed my passwords to start. I then started playing around with the configuration files. Check the documentation online for how to do some of this. Their website is filled with a lot of cool things to do.
Mainly I just wanted to do a post on how to install this through a Windows 11 OS since I wasn’t getting a lot of support here. There will most likely be a third follow-up post once I get the screen in, hook a battery up to this, and take it for a spin.
Also, shout out to these two awesome content creators for some great walkthroughs and help. NetworkChuck originally inspired me to give this a try.
As always thanks for reading and catch you next time,
-sgtdiddlywink